So, y'all convinced me. In fact, with only half of the total opinions in, I already had her under the knife, or scissors, actually! It was a complicated operation, but the patient had a great attitude and should recover nicely.
Caution... naked dolly pictures ahead! If you faint at the sight of wool stuffing, please avert your eyes!
First step, to make her more huggable, I opened her back to remove some of the stuffing from her torso area. I didn't need a big hole, just big enough to get a crochet hook in there to start the removal process.
I found that not only was this dolly stuffed tightly, she was stuffed using really large wads of stuffing. I like to stuff my dolls with little bits of stuffing which is why they end up squishier, I think.
I tried to remove her arm at the shoulder but found that her arm was a single tube that went all the way through her body (also not the way I make mine because then their arms are always splayed open never falling down at their sides). So I ended up opening a seam up under her arms (to minimize scarring) and removing the stuffing that way. There again, not a big hole, just small enough to pull the stuffing out and put some back in in little bits. Once her arms and legs were done (I opened the legs high up on the inner thigh) I stitched her back together with a blind hem stitch. It took a lot out of her but I think she'll pull through! Hah hah hah, I crack myself up! Actually, it was about a quart size baggie of stuffing. Maybe I'll use it to sew her a nice pillow or stuffed animal.
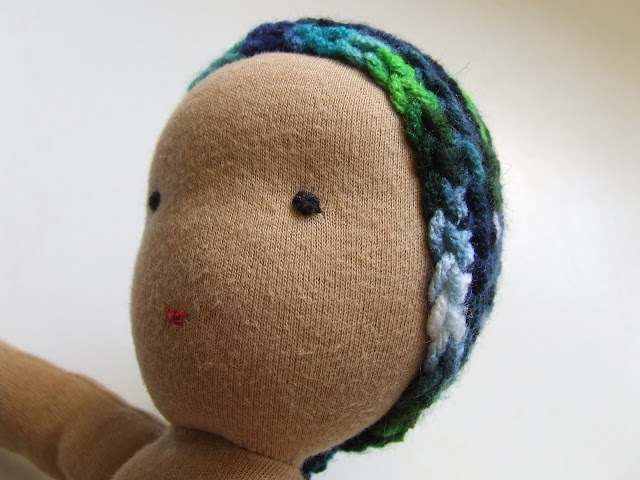
Next step, I started chopping the hair off as close to the stitched line as I could using very small, very sharp pointy scissors. It came off easily and I knew that any remainder would be hidden under the new wig cap.
I decided not to change the face because my big girls said they liked it, buy you can see where the stitching for the eyes and the mouth was hidden under the hair. It would have been easy to change that if I wanted to.
Here she is with her wig cap on. My kids said it looked like an old fashioned bathing cap!
Then we gave her new hair and a pretty side part and voila!!!
A new old dolly who fits in nicely with the purple haired Cutie Beautie and the fiery redhead, Dorothy Ann. She doesn't have a name yet. We are going to let Cupcake tell us what it is once she decides. That could take a while.


Very cute! I admire your courage in hacking right into her. I'd have been terrified.
ReplyDeleteI felt pretty confident only because I've made two dolls like this one from scratch before. It really was amazing how similarly this one was constructed to mine. Just some minor differences here and there.
DeleteLove the new hair! It's amazing how much of a difference a new hair do can make on an old doll.
ReplyDeleteI would love to see how you constructed the wig cap and how you affixed it onto the head... and how you attached the hair to it. We have a dolly in need of a wig around here!
ReplyDeleteLove it!
ReplyDeleteShe's adorable. Can I send you my un-finished Waldorf doll from ages past that only has a head???? ;-) I guess the poor thing will have to wait till my daughter gets the ambition.....which is only (hopefully!)about 6 years off!
ReplyDeleteLove the hair color combo! She's now a trendy doll!
ReplyDeleteYes! Please post instructions on how to do the hair! I have a giant rag doll that has been waiting for her hair for years - I managed a bottom fringe, and discovered my technique was not working, so I gave up. Hats have been her only hope since!
ReplyDeleteThat looks fantastic! Thanks for showing us how its done!
ReplyDelete